DIY Jupyter Notebook Server
[Tutorial] Set up an SSH Server on a Home Computer
Wanting to avoid the hassle of paying for cloud computing services (*cough* AWS) for Kaggle competitions and machine learning projects, I decided to repurpose my old gaming computer to a deep learning rig. After driving down to Microcenter to grab the last Nvidia GTX 1060 6GB card, I spent the weekend installing the video card, downloading all the drivers/libraries, and even troubleshooting an unexpected hard disk failure. (Btw, for an in-depth tutorial on setting up your own deep learning box, refer to Appendix A of Francois Chollet’s book Deep Learning with Python).
After I was finally successful, I wanted to take it to the next step – access my desktop machine remotely. The goal was to have the power of my new GPU-souped rig accessible from my macbook. Enter SSH tunneling~~~
What is SSH?
SSH stands for “secure socket shell”. SSH allows us to establish a secure connection between two computers. An SSH server is a process running on your computer that waits for outside computers to request access via a specific port, authenticates that user, and then allows access to the computer.
Moving forward, ‘host’ will indicate the computer running the SSH server, while ‘client’ will refer to any computer requesting access to the host. In this guide, I’ll teach you how to issue commands from a client machine that are executed by the host machine.
What you’ll need
Before following along, you’ll need:
- A unix-based computer that will host the SSH server (my desktop machine uses Ubuntu 16.04 LTS)
- A different computer to test the remote connection to the server (my macbook, in this case)
- Access to a network different from the one to which your host machine is connected (optional)
- Access to your router’s web interface admin page.
Setup
On your host computer, start by updating your system packages:
$ sudo apt-get upgradeInstall openssh-server and openssh-client. This allows us to run an SSH server on our machine that will handle requests for access to the host computer from other devices. Also, make sure to install openssh-client on machines that will be used as clients.
$ sudo apt-get install openssh-client
$ sudo apt-get install openssh-server
Check that the SSH server process is now running on your host machine.
$ ps -A | grep sshdThe ps command outputs a list of currently running processes
which can be piped to grep to search for the name sshd.
You should see something like this:
[number] ? 00:00:00 sshdAlright, let’s try “logging in” to the host machine from the host machine.
$ ssh localhostTry moving around in the shell (ls, cd, pwd, etc.) and make sure everything’s working. Type exit to end the session.
Connect from the 'client' machine INSIDE the network
First, make sure that your client machine is on the same network as the server. If your client and host are on the same wifi network, you’re good to go.
Get the private IP address of your host machine:
$ ifconfigNow, log in from the client machine using that IP address:
$ ssh username@X.X.X.XYou’ll be prompted for the password of the account you used in your ssh command.
After successfully logging in, you’ll see a “Welcome to Ubuntu X.X.X” message.
Congratulations! You’ve just established a secure shell connection.
Again, move around in the shell (ls, cd, pwd, etc.) and make sure everything’s working. Type exit to end the session.
Connect from the 'client' machine OUTSIDE the network
But what if you want to access the host machine from outside the same network?
On your host machine, get your public IP address by going to www.whatsmyip.org. It should be in the form of XX.XX.XXX.XXX.
$ ssh username@[public IP address]If you try to ssh from your local coffee shop’s wifi with the host’s public ip,
the command will hang and then eventually time out. This is because
when a client machine sends a request to connect to the public IP address,
your router does not know which of the devices on your private network the request is meant for.
I’m not going to go into detail about Network Address Translation, but you can read more about it here.
So what’s the solution? We have to set up ‘port fowarding’ on our router.
Set up Port Forwarding on your router
Port forwarding means telling your router to forward requests made using a specific port to a particular device on your private network.
The process is slightly different depending on the router, but these are the general steps:
-
Log in to your router’s admin page (open your browser to either 192.168.0.1 or 192.168.1.1).
-
Navigate to the page for adding a service (SSH is usually a default option).
-
Enter the port number where requests will be made (22 by default for SSH).
- Enter the private IP address of your host machine.
- (NOTE: if you want to prevent your local IP address from constantly changing, you need to specify a reserved IP address for the host in the LAN. That way the PC will always receive the same IP address each time when it connects the DHCP server. To do so, use your Google-fu skills to look up DHCP reservation or address reservation instructions for your particular router.)
- Save your settings.
Now let’s try..
$ ssh username@[public IP address]You’ll be prompted for your host machine password and then admitted access.
Sweet! Now we can ssh from outside the host machine’s network.
But wait, we’re not done yet! If we leave our ssh settings as is, this leaves us
vulnerable to attacks. After only two days of leaving my host machine on with these settings,
I had pages and pages of logs showing failed brute-force login attempts from Chinese and Russian IP addresses.
To see a log of failed login attempts, use:
$ grep sshd.\*Failed /var/log/auth.log | less
Passwords are notoriously easy to crack, so it’s much more secure to use public key authentication.
Key-based authentication uses two keys, one “public” key that anyone is allowed to see, and another “private” key that only the owner is allowed to see. To securely communicate using key-based authentication, one needs to create a key pair, securely store the private key on the computer one wants to log in from, and store the public key on the computer one wants to log in to.
To create a public/private key pair, follow Ubuntu’s instructions here: SSH/OpenSSH/Keys.
Enable public key authentication on the SSH server
Are your keys ready? Good, now let’s enable public key authentication on the SSH server.
We’ll be making changes to the configuration settings for our SSH server. On Ubuntu, these settings are located in the /etc/ssh/sshd_config file.
To edit this file, you will need to open it as a super user.
In the config file, change PasswordAuthentication to no.
PasswordAuthentication noThis will prevent users from being able to access the server with only a password, protecting us against brute force attacks.
We can also change the port SSH uses (instead of the default 22):
Port [new port number]- NOTE: Your router will still attempt to send SSH requests to port 22, so remember to go back into your router’s settings and update the port number for the SSH service.
Let’s also limit which users are allowed to SSH in. At the bottom of the config file add:
AllowUsers [user1] [user2] ...Next, we’ll disable root login via SSH.
PermitRootLogin noWe can also lower brute force attacks by limiting the number of concurrent connections to the SSH server.
Change
#MaxStartups 10:30:60to
MaxStartups 3Restart SSH server
After you’re finished with all your config updates. Make sure to restart ssh server.
$ sudo systemctl restart sshFinally, let's SSH securely
So you’ve generated your key pair on your client machine, transferred the client public key to the host’s authorized_key file,
and updated the ssh_config file. Also, if you’ve changed your port setting from something other
than 22, make sure that’s reflected in your router port forward settings.
Now let’s log in. (The -p specifies the port number.)
$ ssh -p 'XX' 'user@XX.XX.XXX.XXX'When you generated your keys, if you created a passphrase enter it in. And voila!
Welcome to Ubuntu 16.04.3 LTS (GNU/Linux 4.13.0-32-generic x86_64)We’re in.
Connect to server's Jupyter Notebook via SSH tunneling
Now say you’ve got Jupyter Notebook and all your favorite data science libraries on your server. How can we connect to the Jupyter Notebook web interface running on our server?
Set up a password for Jupyter Notebook
Starting at notebook version 5.0, you can enter and store a password for your notebook server with a single command. jupyter notebook password will prompt you for your password and record the hashed password in your jupyter_notebook_config.json.
$ jupyter notebook password
Enter password:  ****
Verify password: ****
[NotebookPasswordApp] Wrote hashed password to /Users/you/.jupyter/jupyter_notebook_config.json
SSH Tunneling with a Mac or Linux
We update the ssh login like so:
ssh -p 'XX' -L '8000:localhost:8888' 'user@XX.XX.XXX.XXX'-L specifies that the given port on the client is to be forwarded to the host and port on the remote side.
This means that whatever is running on the second port number (i.e. 8888) will appear on the first port number (i.e. 8000) on your local computer.
SSH Tunneling with Windows and Putty
If you’re in a Windows machine, see this guide for Putty instructions: https://www.digitalocean.com/community/tutorials/how-to-set-up-a-jupyter-notebook-to-run-ipython-on-ubuntu-16-04
So now, on your client computer if you open your browser to http://localhost:8000,
you should see the host computer’s Jupyter notebook web interface.

You’ll see a login screen. Enter the notebook password that you had defined earlier.
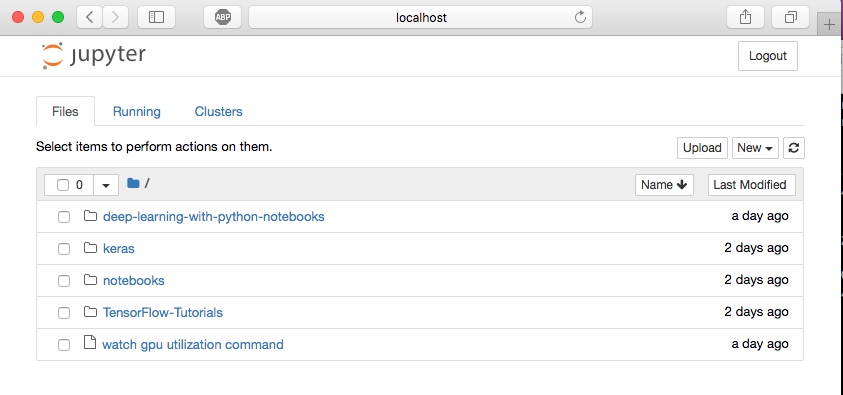
Presto! Now can run your server’s Jupyter Notebook from your laptop computer.
Some closing thoughts
All in all, it’s way easier to use cloud. But if you want a dedicated machine for personal projects without the hassle of hourly $0.90 charges looming over your head, it pays to put in the sweat to set up your own server.
Sources:
https://dev.to/zduey/how-to-set-up-an-ssh-server-on-a-home-computer
https://help.ubuntu.com/community/SSH/OpenSSH/Keys#keys-with-specific-commands
http://jupyter-notebook.readthedocs.io/en/stable/public_server.html#automatic-password-setup